Wednesday, June 20, 2012

Mirror, Mirror on the Mantel

Pinterest has been blowing up lately about mercury glass/mirrors/reflective jars/etc. all made using this fancy shmancy spray paint.  It's made by Krylon and called Looking Glass.  I searched all over for the blasted stuff (Walmart has a huge Krylon section, but no stores within 50 miles carried it), and finally found it at a Hobby Lobby in the area.
Don't let the pretty pictures and easy tutorials online fool you.  Most blogs I visited referred to it as "cheap" mirror in a can.  Lemmi tell ya....stuff ain't cheap.  I bought two cans to the tune of $12 a piece.  And they aren't even normal sized spray paint cans!  But I had high hopes and I'm always doing the thrifty thing, so it felt good to splurge a little.

I wasn't really sure what purpose the end result would serve, but I was itching to see how well this stuff really worked.  I started with a garage sale find - a 6 pane window purchased for 3 smackaroos.
The tutorials and the can itself all said to make sure you spray the back side of the glass to get the best results.  So i chose the nicest side of the window and flipped er over.

I decided I wanted an "imperfect" mirror finish (equivalent to mercury-ish glass) and something that appeared older rather than fresh and clear.  Ever see an old mirror that has marks and smudges?  Yea, that's what I did....intentionally. 

Tutorials were saying to splash the glass with water droplets before spraying.  So that's what I did.  Then I applied several light coats of paint, making sure to work from one side all the way to the other without stopping.
One can later, I had a silvery finish on the back side of the glass.  I wasn't impressed until I flipped it over, but we'll get to that.  I did notice that the water droplets left marks a lot like leopard spots.  They weren't as random as I would have liked.  So while the paint was still wet, I took my finger and smudged the water around a bit to smear it and make it less perfect.  Then I started with the second can and sprayed some more.
See the water droplets?  It was really weird how the paint just covered over them but they stayed wet for awhile.

Once the paint was completely dry (it didn't take long in 90 degree heat), I decided to do another step that no one else seemed to do.

I used some leftover black spray paint and painted another layer over top the silver.
My theory, which proved to be correct, was that once the water droplets dried, the silver paint would flake away and leave clear areas.  So the black paint sprayed on the back would make those clear areas appear dark from the front.  Which would ultimately add to the "old/vintage/antique" effect.  You follow?  Not yet?  Keep reading...

Side note:  My parents recently gave me a box of old blue tinted mason jars that they unearthed from their attic.  Add those to the ones I just bought at the flea market and the ones I already owned, and I had quite the mini collection going.  Fast forward to this project where I had no idea what to do with it when it was done and....

I decided to redo the fireplace mantel with softer colors for summer.  In comes the new "mirror".


The paint actually worked really really well.  See the dark imperfect marks on the mirror?  In person, you would find it hard to tell it wasn't 50 years old.

I also did a little dry-brush paint effect on the window frame itself.  My "go to" colors are always blue and green in our living room, so I paired those two with black.

The reflection, though slightly muddled by the antique-ing, would actually work great as a real mirror.  I was admittedly impressed with how well it worked (almost $25 later, it better look good!). 


I love fillin' up a mantel....the thing just looks so boring when it's empty!

It ended up being a successful project and something I would do again if the right piece presented itself.

Thursday, June 14, 2012

Craftswoman Tool Chest

For the longest time, Dan and I have both been wanting one of those fancy, free-standing, rolling Craftsman tool chests.  However, neither one of us are willing to cough up $400+ for one, no matter how cool they are.  But nevertheless, every time we are in Sears, we pass them by with longing in our eyes (Note: did you know they make a PINK one now??! Whaaaa??).  But the more I thought about it, the more I realized they don't really hold that much - nothing big at least.  He has the small metal chest he fixed up for his basement man cave for all the little things (nails, screws, small tools, tape, glue, misc.) but he was using an old bookcase to house the drill, nail gun, drill bits, socket set, saws, etc.  Stuff that came in big boxes and wouldn't fit in the standard rolling tool chest.  I decided to not only remedy this situation, but also finally give us the Craftsman tool chest we've been coveting.

So the hunt was on to find a dresser.  I knew it couldn't be just any old dresser, either.  Not like the ones I usually find by the side of the road.  This one had to be specific.  I searched some local thrift stores and came home with this beauty:

The price tag was a little more than I would normally spend (considering I usually get them for free), but I justified it by knowing I found something that would work perfectly!

Can you visualize it yet??

With Dan being out of the country for work this past week, I decided to make it a surprise for when he gets home. 

I started by sanding the whole thing down to give the paint something to stick to.  This is a shot of the top of the dresser after about 10 minutes - it was sooo easy!  Sanding is by far my least favorite part of a project and I only wish they all went this well.

After sanding it all down, I applied 2 coats of Rustoleum Sunrise Red oil-based paint.  A little messier than latex paint, but it gave it a nice, crisp, shiny finish (the goal was to make it look more like metal than wood).

I debated on the color of the drawers.  Red or black??
I decided on black because I liked the contrast and didn't want to overdo it with the red.

Finished product:
Pretty good, huh?  I lucked out with the handles.  The existing ones were already perfect for what I needed, so all I did was spray paint them silver.

I cut off the legs and added rolling casters.

I added black industrial handles to each side to make it easier to move around.

I purchased a roll of ribbed vinyl floor runner from Home Depot and used it to line each drawer.


And because it looked so darn cool, I posed it with some of Dan's antique tools he has in the garage.


There's even going to be a special tool surprise for him inside :)

Total cost was around $75 (remember I spent quite a bit on the dresser itself, but that's because it didn't need ANY modifications!) which is a fraction of the cost of buying a "real" one at the store.  Plus, this can hold all the bigger stuff that these chests don't usually fit.  Overall, I'd say it's a sweet deal, and a sweet surprise!!

Thursday, May 24, 2012

Kitchen Redoux - Part 3...finally!

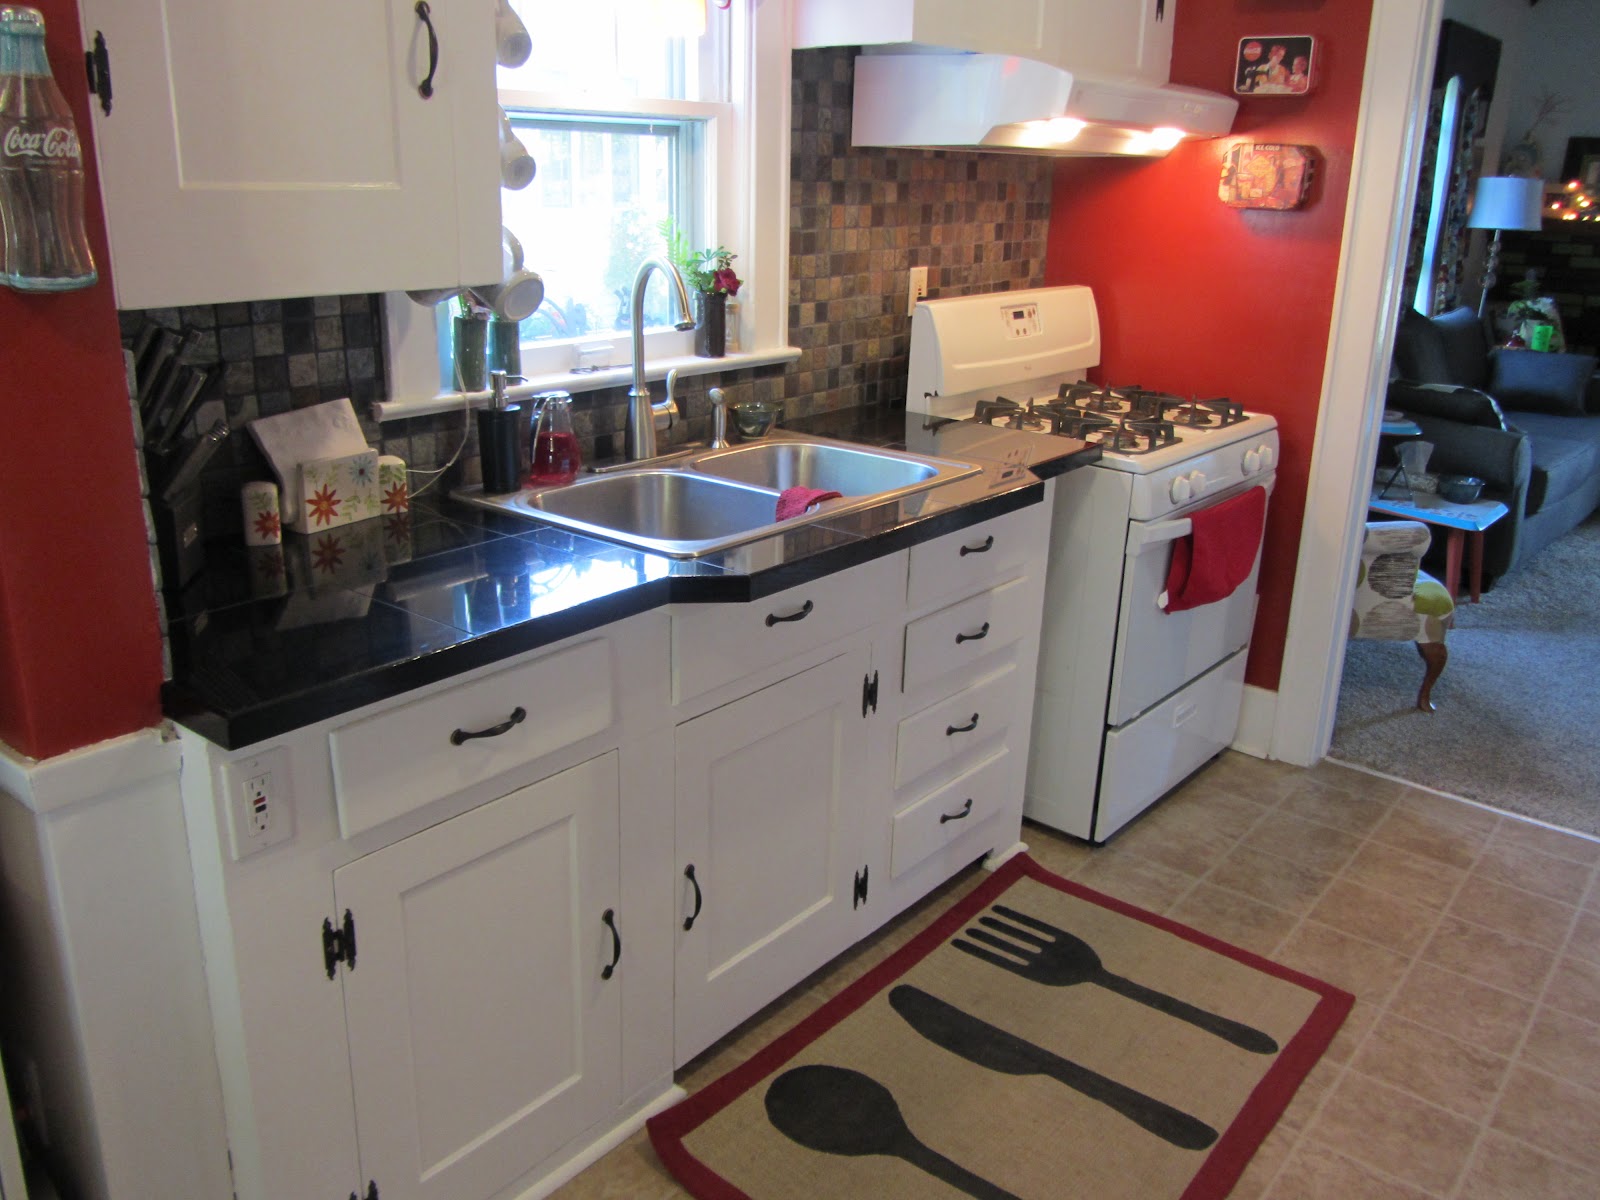
Lemmi guess....you just assumed we forgot all about our kitchen remodel since it has been months since I posted any updates?  You would be somewhat correct.  After we got it back in working order, the little details fell by the wayside.  Trim work, painting, and touch-ups were put on the back burner the second the sun started to break and the weather got warm.  We moved the party outdoors and left the kitchen to tend to the patio.  The ultimate push came when we decided to host my sister's college graduation party.  We finally had an excuse/reason to finally finish the little things.  With the party being held this past weekend, the kitchen got a thorough cleaning and was ready for its close-up.

Let's backtrack a minute though, just in case you forgot where it all started.  Make sure you've checked in to the first 2 installments (here & here), and the accessorizing I did to get to this point.

Since we last updated our progress, we were able to bust out my new router and table to give the counter trim a rounded edge and look more finished.  The cabinets got a fresh coat of crisp white paint, the new range hood was installed, and the backsplash was installed and grouted.

Here we go!
Before (from living room)


After (from living room)
Before (from dining room)


After (from dining room)

Before (from back foyer)

After (from back foyer)

We worked really hard!  With all the cabinets being original to the 1930s house, there was A LOT of modifications....remember I was planning this for a weekend project (important tidbit I am often reminded of!).  But, as a recap, we were able to extend the length of the counter by about 2 inches - it doesn't sound like a lot, but trust me...it is.  We also added the angled part to the front of the counter.  It really helps serve as a ledge to rest things, and allowed us to pull the sink further from the wall.
Before view of behind the sink
After view of behind the sink
That tiny smidge of counter you see behind the sink ledge was all we needed to make the new sink sit correctly.

Here's another view of the counter space to the left.
Before - left side of counter
After  left side of counter
We also added some fancy trim pieces for the edges.
Trim being added
Trim drying
Trim painted and done!
And that, my friends, is how you remodel a kitchen!  Total budget came out a liiiiiiiiittle bit higher than I planned for, but we did everything ourselves (we considered buying ready-made cabinets for about a millisecond) and we modified existing elements as much as possible.  It really was the final touch to redoing our home.  Now we need to move so we can work on something else! :) 

Tuesday, May 8, 2012

Record Player Rehab

I gotta admit, I'm pretty pumped about this reveal.  I've been searching high and low for a long time for something that our television could sit on, and I finally got it!  For FREE - even better!  Without further ado, I give you this.....

Sexy, right? 
It's an old AM/FM radio and record player console.  The middle flap on the top lifts up and reveals this...
And the side compartments house the speakers.

The fancy scrollwork was the whole reason I fell in love with this piece in the first place.  I was extra careful during deconstruction to make sure nothing happened to these pieces.

So where am I going with this?  Well, first things first, I had to rip that sucker apart!

I got a studly man to start cutting through the front panel of the console.  This is where the components would sit for the TV.
After several hours of demolition, I ended up with this mess and a garbage can full of junk.  But the more I started taking things apart and removing stuff, the better the soon-to-be-finished product looked.

After Day One (and after I cleaned up my mess) this is where I was at.  It not only looked better, but it weighed about 50 lbs less after all the stereo stuff was removed.  Note: the top flap was on hinges and no longer stayed down once I removed the radio attached to it.  I later solved that problem by using magnets to keep it closed.
I built a shelf in the middle using leftover MDF board.

The next day I got to work on painting.  I decided to make the whole console white, using leftover white paint from our bathroom remodel.  The fancy scrolled panels were going to be different though, to let them stand out.  I laid them out and sprayed them with aqua spray paint I had on hand.

I didn't get any other working shots, mainly because I was anxious to get this thing finished and in our living room.

But here she is....

Allow me to point out a few things:

1.  The blue panels were backed with coordinating fabric I had in my fabric stash and turned into door panels for the speaker cabinets.
2.  The center of the console was cut out and turned into shelf space for the television cable box.
3.  The shelves and middle area were covered with leftover wallpaper from the stairwell project I did last month.


The paint job took several coats (like SIX!) but I used a high density foam roller that made sure it was a smooth and even finish all over.

Before I brought it inside, I had Dan do a once-over to make sure I didn't miss any spots with the paint (he had been pointing places out all along, being anal as usual).  This was his idea of being funny, inspecting my work....

Luckily though, it passed inspection and we were able to bring it inside.


It fits the size of the television so much better than the cheapy Target model we bought several months ago (which is now being listed on Craigslist).


I added hinges to the blue wood panels, which now serve as doors.  A great place to stash junk and Wii games out of sight.

I'm soooo happy with the finished product!  It looks fantastic in the living room and is the final piece I've been looking for.

And I know I'm probably the only one who would pair a blue and white console next to a pink chair, but I think it works for me :)

You like??