Thursday, April 12, 2012

Reveling in Retro - Wall Clock How-To

Let me start by saying, this project was hard! I mean, five solid hours of work hard. I'm talking, power tools, hot glue, and band-aids hard. Now that it's complete, I continue to wonder why/how I get myself into these situations. Also, this is my first attempt at an actual step-by-step tutorial for the Pinterest world out there...so bear with me on the length/detail of this post. I fully understand that not everyone is as crazy as me when it comes to tackling projects!
The clock hanging in our living room now doesn't work. It's only a year old and cost $25 at Hobby Lobby, but five fresh AA batteries later, the thing still can't keep time. I had settled on it because, even a year ago, I wanted the starburst clock and couldn't find one. It was funky enough to tide me over, but the fact that it says its 12:12 and it's actually 1:20 just wasn't working for me anymore.

I've forever coveted the starburst retro wall clocks that graced the living rooms of the 60s and 70s (along with shag carpet, rotary phones, and funky ceramic ashtrays). While shopping at a HomeGoods store about two months ago, I came across one that looked truly authentic. It was $30, it was awesome, I didn't buy it. Stupid, stupid, stupid. I kick myself daily for not coughing up the 30 bucks, because when I went back a few weeks later, they were gone. Sad face. After a tiresome effort to Google the heck out of "retro wall clocks", "starburst retro wall clock", "70s style clocks", and the like, I couldn't find one for less than $75!! Plus, the majority of the authentic straight outta the 70s versions were electric. Not cool nowadays. And since I wasn't about to drop $100 on a clock, I did what I always do......I made one instead.

So here is what I came up with:
1. Small stencils to make the numbers - $1.79
2. Eight wooden spoons - 3 packs of 3 for $1.49 each=$4.50
3. Eight 1" wooden balls - $2.79 for a package of 20
4. *Optional* Metal accents found in the scrapbook aisle of the craft store - $1.49
5. Clock parts - $6.50
6. Eight metal rods of any type - you could also spray paint wooden dowels - FREE from my dad
7. Silver/chrome spray paint - had on hand
8. Wooden cutting board or similar wood disc - $5.99

Total: less than $25!!

Now, there are several things I need to point out first before we proceed.  First, I bought the stencils for the numbers before I decided to use the face of our existing clock instead.  But if you don't have that as an option, then continue with the stencils.  Second, I bought the cutting board for $5.99 thinking it would work perfectly.  However, as you will see next, it was too thick for the clock mechanism.  So something thinner might be a better option.

Here is where I started:

With the board wedged in the vice (be sure to use scrap wood on the outside to protect your clock from vice marks), I drilled a 3/8" hole right in the center for the clock mechanism.  *The two smaller holes you  might see are for the glass clock face, again only in my situation.*

It didn't take me long to realize that the board was too thick.  The arm of the clock wouldn't fit through from the back.  I had to chisel out a spot for the square clock works to fit.  It was awful and messy, but I got to use my grandpa's wood carving tools, so that was a plus.  So here is the lesson: make sure to use a board that isn't too thick.

Next, using a protractor and my handy engineer husband, I marked out where I wanted the starbursts to stick out from.  There would be eight spoons and eight metal sticks.  That was my own decision, but you could use as many as you want.  Then with the board still in the vice, I drilled where the marks were.  The big holes you see are for the spoons and the small hole is for the metal stick.  I repeated this all the way around.

I had a small amount of space on the wall (about 20") to work with, so I had to be careful how big my starbursts stuck out.  Here is a shot of be Dremeling off the tops of the metal sticks because they were too long.

Next, I had to drill holes in each of the wooden balls.  These are going to go on the ends of the metal sticks.  I thought about clamping them in the vice, but the best way was just to hold them in my hand and slowly drill halfway into each of them.
Caution:  the keyword is slowly.  This is what happens when you go too fast...and also what I meant earlier about band-aids being involved.  It doesn't look too bad here, but three days later it is really sore!

The wooden spoons I bought were of varying lengths, but the spoon itself was the same size.  According to my size constraints, I used the band saw to cut the handles down to be all the same size.  Then I dry fitted the pieces into the board before officially gluing them in.  I used a hot glue gun, my favorite tool, to get the spoons in.  The metal sticks were tight enough that they didn't need glue.  Then the wooden balls got inserted onto the ends.  Is this making sense??

Now here is where you are on your own.  I then added the glass clock face from our previous wall clock to the front of the board.  However, you're going to have to use the stencils to make the numbers on the front.  Or, if you want, you could just use hash marks instead of numbers.  Or just 12, 3, 6, and 9.  Your call.

Here she is!  So you're wondering where the spray paint and metal accents come into play?  Well, the clock piece came with gold hands (boo) so I spray painted them silver.  The metal accents were attached to each spoon as you can see here.  Again, this is optional, but I think it adds a little something.


I'm not a teacher, I get ahead of myself before I realize I missed snapping a picture, and I didn't set out for this to be a how-to.  But I hope it was easy enough to follow along and fix it to how you want.

For a fraction of the cost of the ones I found online, I now have a one-of-a-kind retro starburst clock in my living room :)

Tuesday, April 3, 2012

Hairpins

I realized as I was compiling the pictures for this post that I never actually talked about how I made the coffee table in the living room.  It is a one-of-a-kind J. Paris Designs creation, of course, drawn up from the retro part of my personality.  I was going for the kidney-bean shape from the 60s and 70s.  I used a 3/4" sheet of plywood as the top and drew out the shape I wanted.  I cut it out with a jigsaw.  The paint was actually leftovers I had on hand and was watered down a little so the grain of the plywood would show through.  I stained the edges of the table in dark ebony. 

Side note: I put several coats of polyurethane on the surface.  It was cold outside so I did this in the basement.  Bad idea!  We slept with the windows open for two nights so we wouldn't asphyxiate in our sleep.  Take it outside next time!

You can see another shot of it in this post.
The most important aspects, in my opinion, are the 3 slanted legs.  They couldn't just be straight up and down or the whole look would be off.  I stole the legs from a small tripod table complete with hardware.  I went to extreme lengths to get those legs sturdy.  The metal brace wasn't enough so I used hinges as supports.  The below picture shows a close up of the contraption I came up with.
Also, if you look close enough, you can see how the brace is sorta bent a little.  That was due to me trying to pull the table closer to the couch one day and the front leg got stuck in the carpet....crack!  It's been sitting like this for 6 months.  It's wobbly, unsteady, and can't really move anywhere without risk of cracking the fragile wooden leg further.  This brings me to the point of this post.  I need new legs.

Originally, when I was building the table, I wanted authentic retro hairpin legs.  But I was trying to be cheap and cut corners.  See above story about shotty leg craftsmanship.  Until I just couldn't take it anymore.  I actually found a website for a company in Columbus that sells strictly hairpin legs, appropriately named hairpinlegs.com.  I decided to man up and spend some moula on the legs that would effectively make my table as retro as possible.

They came on Monday and I was admittedly giddy with excitement.  I was proud that I finally purchased what I had been wanting all along.  They were raw steel (the stainless ones were twice as much - I was manning up, but not that much) so they needed covered with a clear coat so they wouldn't eventually rust.
Luckily it dried quickly, so I was able to attach the legs ASAP.

These legs were attached at three different points with the screws spread out about two inches from each other.  This made for a much sturdier table in the long run compared to the old legs.

Doesn't it look cool?  Straight outta the 70s and into my living room!  I love them - so glad I decided not to be so cheap.  Plus, I can cross this off my to-do list :)

Tuesday, March 27, 2012

Not Your Average Dinner Plate

A quick little post about a quick little project that's been several years in the making.  Funny how those project ideas I spend years thinking about can be executed in approximately 20 minutes.

Ain't no secret I'm a thrifter...a garage sale, Goodwill, and Salvation Army junkie. 

Note:  Garage sale season is right around the corner (!!!). 

So, throughout the years I've accumulated a medium sized collection of plates.  Random, pretty, interesting plates that had no other members of its family and were destined to be a part of my decor someday.  That day is today. 

The fact of the matter is, I'm out of wall space.  That's right, our 1100 square foot house has zero wall space left for this plate installation.  So outside I go.  To the back porch, to be exact.  It's the only place that has ample wall area.

I used E-6000 glue (multipurpose, holds everything) to attach a metal picture hanger to the back of each plate, making sure lots of glue oozed through the hole for better security.

The only nails we had in our nail stash were headless.  Not ideal, considering I didn't want the plate to slide right off.  To fix that snafu, I pounded the nails in the wall at an angle so the heavy plates wouldn't (fingers crossed) fall.
Working from left to right, I started with the largest plates first.  And this is where I ended up...

I was trying for a "sweeping" pattern and sorta kinda got there. 

This one is my favorite.  Pretty pastel blue and delicate little flowers in the middle.
 

That's it.  Pretty and simple...my favorite kind of project!

Monday, March 26, 2012

Color Ties

While errands and a killer migraine kept me from my usual Sunday craftiness, I was able to squeeze out a few last minute projects this past weekend that only cost me about 10 minutes each. 

If you've been living under a rock for the past few months, then you probably don't know about Pinterest.  It's completely addicting....that's all you need to know.  Well, that and the fact that I like to steal some project ideas from there on occasion.  And this is one of those occassions, once again formatted to fit my needs.

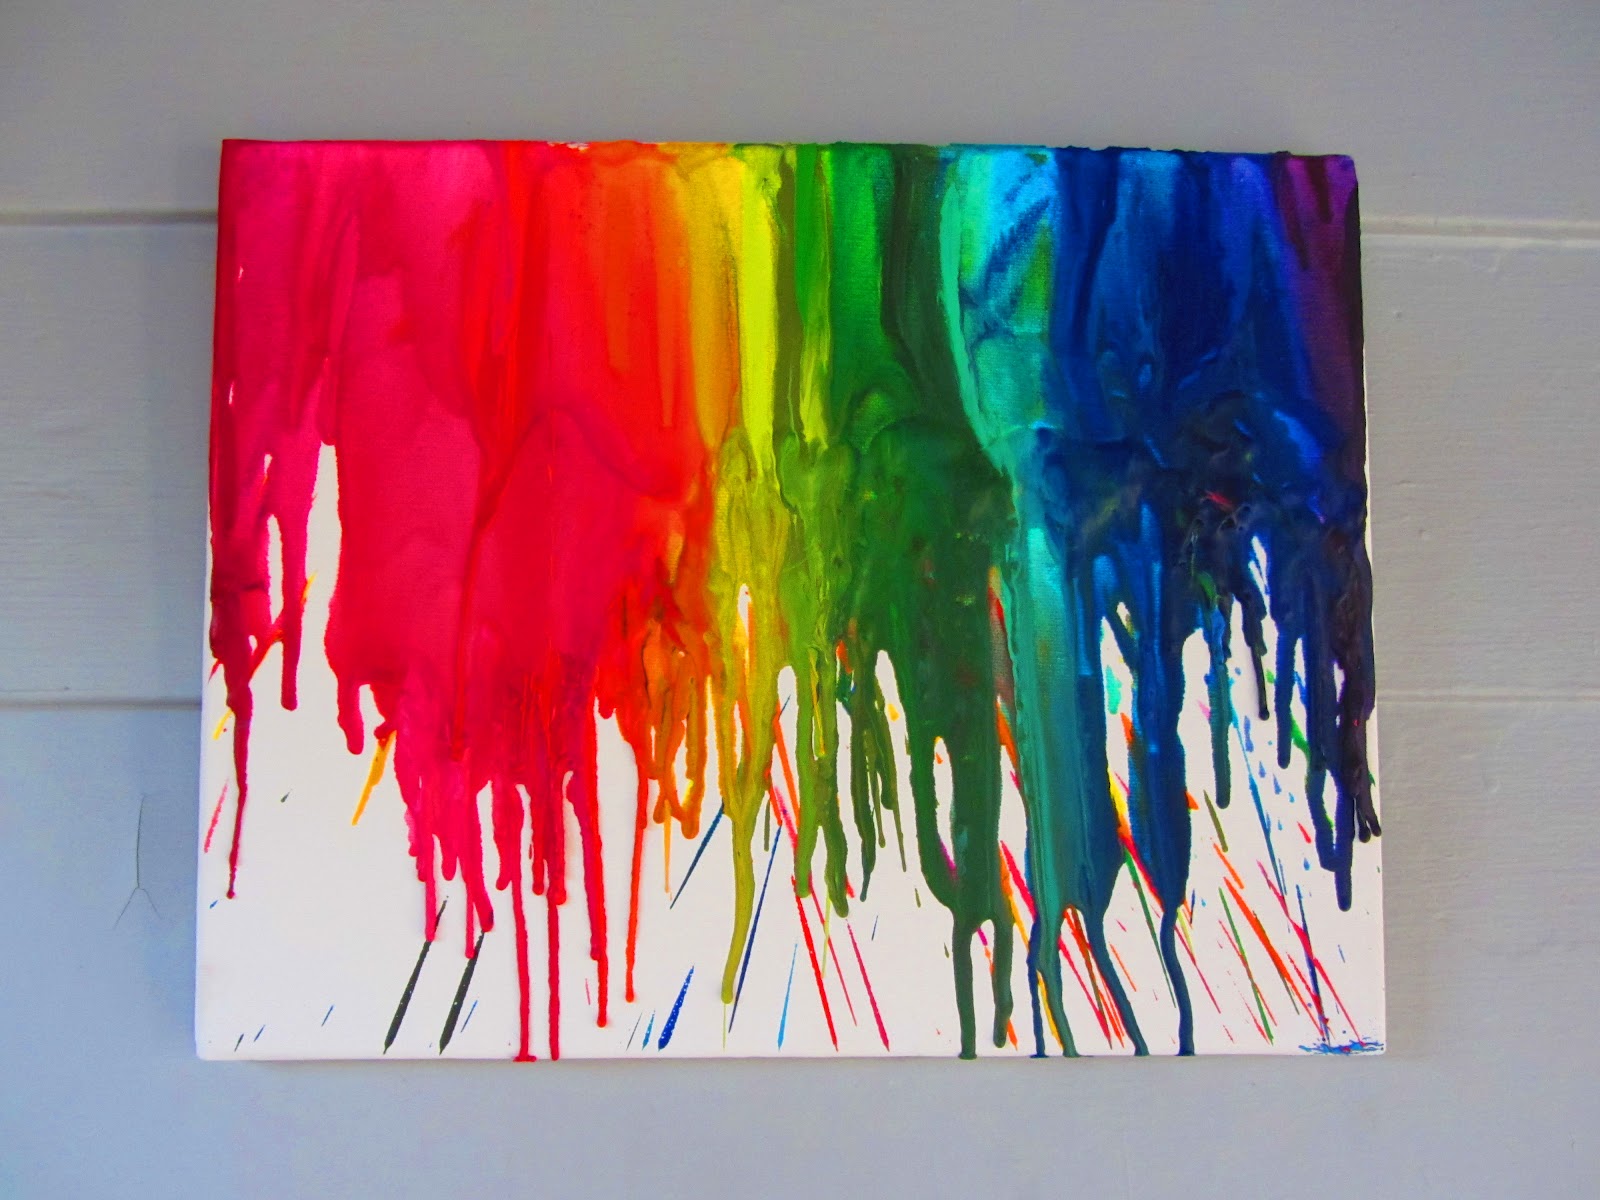
The online community is buzzing with crayon art.  Yes, crayon art.  And while it consists of a bit more than coloring inside the lines, it is still just as fun as it was when we were kids.  Case in point, you get to use the WHOLE box.  When were you ever able to rip out all the crayons and use every single one at the same time?  Or was I the only OCD child who had to put each one back when I was finished with it?  Hmm...anyways.

Here is where we start...

I bought a smallish artist's canvas for el cheapo...$3.99 to be exact.  Don't ever pay the ridiculous price at the craft stores.  They are intended for actual artwork with fancy paints and all...not crayons.  I hot glued a piece of cardboard to the top.  Most tutorials told you to hot glue the crayons directly to the top edge of the canvas.  I felt like this would take up too much of the canvas, so I "extended" it with cardboard.  Then I arranged all the pretty colors in a rainbow, following the Roy G Biv theory (shout out to my high school chemistry teacher for engraving that into my brain).  Then, I got to work.

Standing the canvas upright and armed with my hairdryer, I turned the heat high and started at one end, slowly melting the crayons. 

Warning:  This is MESSY.  Cover your work area (found that out the hard way on Dan's new work bench...oops) and be careful of your clothes.  When the crayons start melting, the air from the hairdryer will blow the little dribbles of wax all over the placeThey dry instantly on whatever they hit.


See the dribbles??  They were everywhere!  But the finished product turned out pretty interesting.


At least it looks like all the other crayon art out there in the Pinterest world.  It looks even better atop our colorful and layered mantel.


My second project was just as quick and easy.  One of the many perks of my job is that I receive "points" for selling certain products.  These points can accumulate into free carpet for our living room, a 3 piece Vera Bradley travel set with matching purse, a Coleman 2-burner camp stove, a Kindle Touch, and my recent gift, a 4th generation iPod Touch.  This new gadget of course required a case to protect it.  So I set out to spend less than $50 (which was the cheapest one I found online).  I turned to Goodwill for this one.

Using a $1 men's necktie, I transformed it into a sleeve.  I cut it to the correct length, allowing enough for it to be folded up to form a pocket.  Then I hemmed the cut end, as seen at the left of the above picture.
Then I folded it again, making sure that it was still long enough for the iPod to fit inside.  Then I stiched along each side.  This, essentially, made two pockets.  The main one, which holds the iPod, and then a front, smaller one that can hold the earbuds.
See? 
I added a small piece of velcro so that the top flap could close.  This way, when I throw the whole thing in my mess of a purse, it won't get scratched up.  Easy peasy.

Tuesday, March 20, 2012

Light Me Up

I've been a busy bee ever since the weather broke, moving outside with my projects after being cooped up all winter.  My ultimate plan for the back patio is still taking shape, but will be completed by the end of May for my sister's graduation party.  Until then, we've already touched on the bench I made for the patio over the weekend, but there are some other details I've been fiddling away with. 

The patio has always been lined with tiki torches (5 of them to be exact - nothing crazy, but it gives some ambiance).  They lasted 2 summers in the sun and rain, and by last fall they were ready to be pitched.  Purchased for $3 a piece, they had a good run.  But that left us with buying new ones for this upcoming summer.  That is until I came up with a different idea.  Of course, I can't take all the credit; some is due to Pinterest.  However, I did put my own spin on it.

With a trip to the plumbing department of Home Depot and a dip into my uber-huge stash of blue wine bottles, I had the makings for a brand new set of torches.

Let us begin with the basics:
I got 5 pine 2x2's from the lumber section for about $1.50 a piece.  I cut them to the height I wanted, making sure to make a steep angle on the end so it could be forced into the ground.  Then I stained them with some wood stain I had on hand.

Next, I attached a 3/8" copper base plate to the 2x2.


Then, we get to the bottles.  I attached a 1" copper pipe clamp to the neck of the bottle.  I used a 3/8" copper coupling wrapped in teflon tape (to create a water-tight seal) that was inserted into the mouth of the bottle.  This is what would hold the wick.

The whole contraption was attached to the post using a 2" piece of 3/8" threaded rod.  You can see the overall assembly in the above picture.

I drilled out a space in the top of each post for the copper pipe cap to rest.  When not in use, the cap covers the wick and keeps it dry.  I didn't want it to get lost when you take it off to light the torch, so the small impression works to hold it.

I searched high and low for replacement tiki torch wicks - not Home Depot, Lowe's, or Sears had any.  I finally found them at a local True Value hardware store.  They had a 2-pack for $4.29.  Kinda pricey, but I had given up hope of finding them anywhere else.

After all was said and done, each torch cost about $5.  Not bad, considering wimpy bamboo ones can run about that much.  These ones will last forever!

So, fill 'em up, insert wick, light, and enjoy!

More outdoor designs coming your way!!

Sunday, March 18, 2012

Header/Footer

Another AHmazingly sunny Sunday around here.  What does that mean for me??  Another awesome Sunday project to cross off the ol' To-Do list.  Wanna guess what I turned these in to?

Seriously....winner gets a virtual high five...and a cookie.  Not really.  But take a guess anyway.  No peeking!!

Last summer's garage sale-ing scored me this headboard and footboard combo for $20 (talked them down from $30 - oh yeah).  More than I usually spend on a garage sale item, but this was big ticket and antique.

Still guessing??

A bench!!  I know, weird...but what else is new?

Let's get started on the how-to, shall we??

I started by cutting the footboard in half down the middle.  These pieces became the sides of the bench.  I used furniture dowels and drilled holes and attached the sides and...it's getting technical, sorry.  Besides, it was dark outside at this point and I didn't get any pictures.  So we'll skip the boring parts.

Once the frame was completed, I used scrap 1" plywood for the seat.  I used L-brackets (seen below) to secure the bench seat.


Then, I added a brace down the middle and an "apron" in the front (also known as a 1x6 pine board).

Here's the underside with the bench laying on its back.

Now, before I get to the finished product, let me show you the spot on the back patio where I wanted this bench to sit.

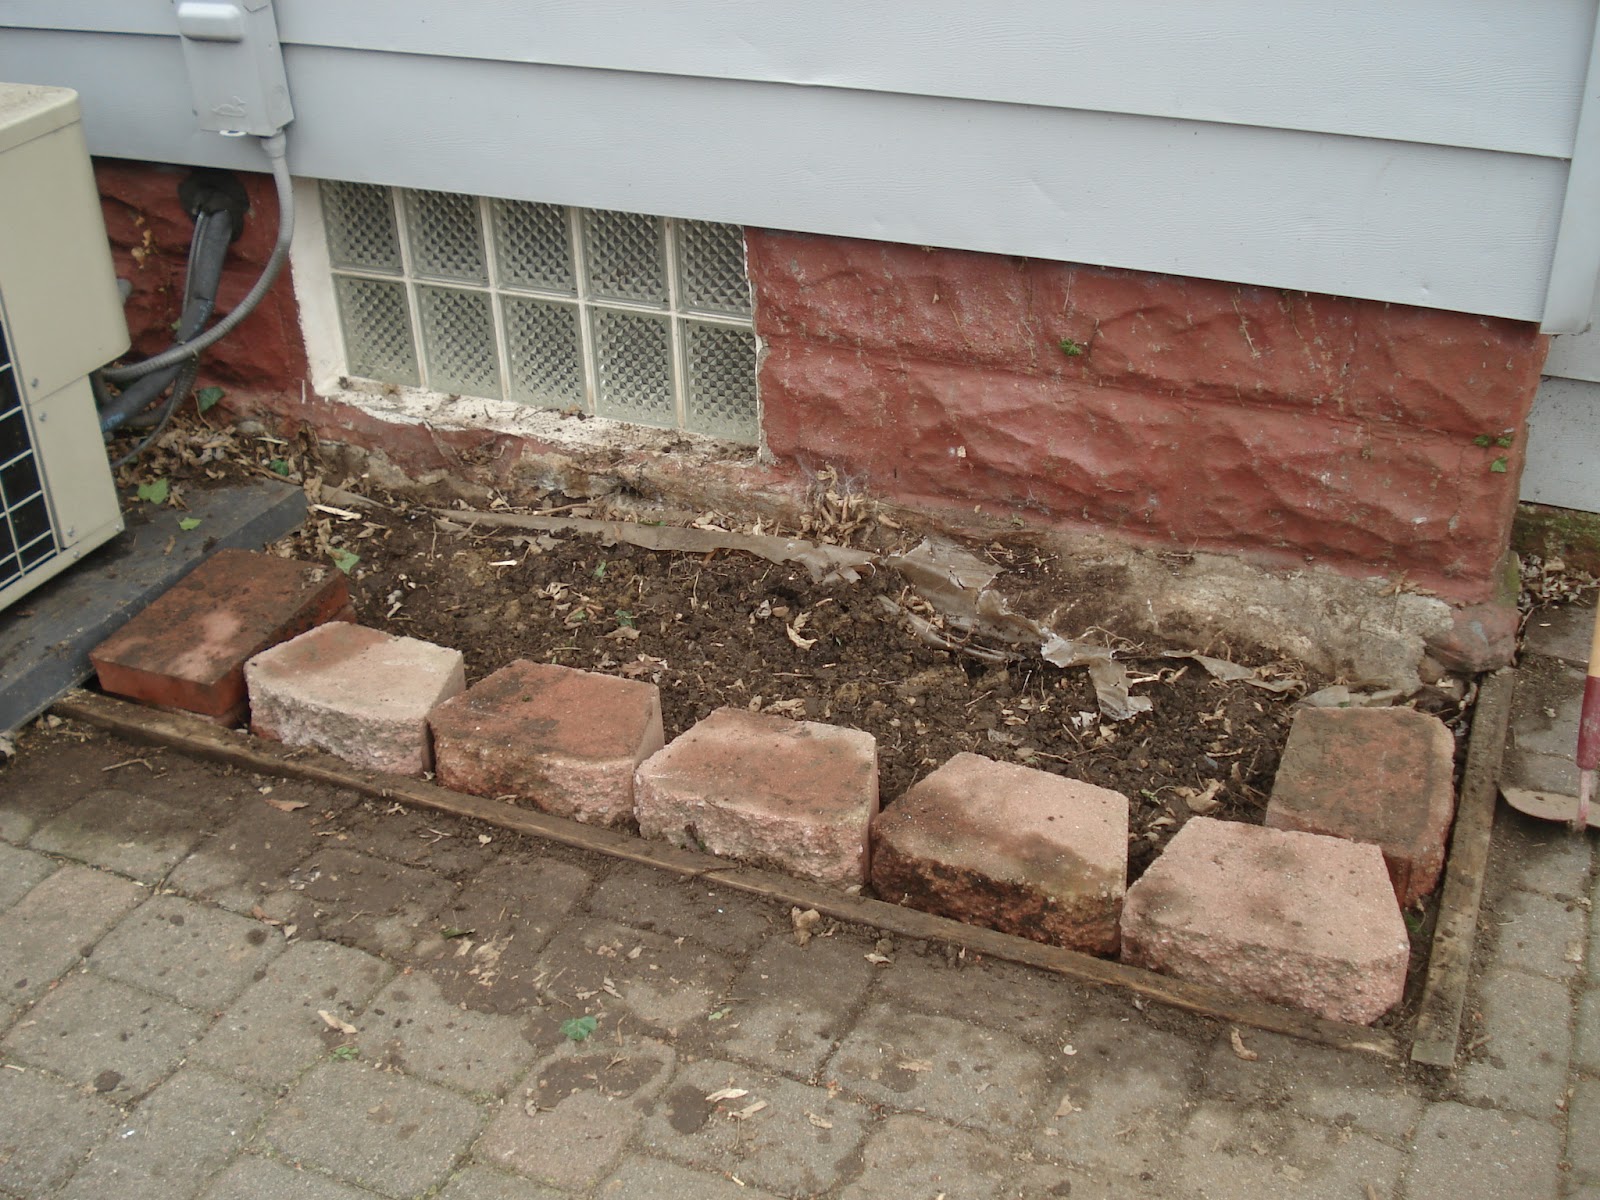
Yepp, right there, on top of the ivy.  Damn that ivy.  I've been wanting it gone for 3 summers now.  This spot serves no purpose and is wasted space on the patio where extra seating could exist.  So I got to work.  Has anyone actually ever ripped a patch of ivy out before?  Me neither....and I never will again.

45 minutes in and this is where I'm at...
What. A. Mess.  The roots are completely intertwined and twisted and thick and DEEP.  So deep in fact, that because it is close to the house, I wouldn't be surprised if some of them have reached under the house!  Honestly, I was pulling roots out as big as this...


So I raked, and hoed, and shoveled, and scooped, and dug....for 2 hours!!  Two full lawn bags later, my back ached, my arms were sore, and I was covered in dirt and sweat.  Yuck.  But I ended up with this....
I used some leftover landscaping bricks to form a perimeter.  I'm aware, however, that the ivy may grow back.  Even though I hacked at as many roots as I could get to, I'm sure because it's a vine it will remain hearty despite my efforts. 

Ok, so the bench.  Here she is pre-paint:

I used leftover paint from my studio downstairs that matched the fabric I wanted to use for the cushion.

And here she is painted up:

I haven't bought a foam cushion yet because they are expensive and I'm waiting for the next 40% OFF coupon from JoAnn's to come in the mail.  So for now, the fabric provides a visual and I used 2 spare pillows that matched as well.

A comfy and colorful summer seat.  Weekend project...Check!

Tuesday, March 13, 2012

Tour Eiffel

After my morning run on door decor, I decided to continue on with small craft projects on the back patio where the sun was still streaming through the leafless trees. 

Back in October, when Dan and I went to Paris for our honeymoon, we took a gazillion pictures of the Eiffel Tower.  After spending your entire life dreaming of it, it was hard not to snap as many as you possibly could every time we passed by....which was a lot.

So for this project, we have to backtrack a few summers to Boston, Massachusetts, home of the Boston Red Sox and Fenway Park.  We were visiting family for a week and got tickets to a Red Sox game...Dan's dream.  Long story short, he took several shots of the stadium from our third baseline seats.  Starting at the left with the Green Monster, moving right.  Kinda like a homemade panoramic.  We printed them out and arranged them, overlapping, to form a long panoramic of the whole stadium just as we had seen it in person.  Pretty cool.

Fast forward to Paris in October with a gazillion shots of Eiffel.  Dan decided to do the same thing.  Not that we don't have a million full shots of the tower, but it was cooler this way.  He started at the bottom left and just kept moving the camera ever so slightly back and forth til he got to the top.

I finally got around to printing them out in black and white and used spray adhesive to attach them to pieces of black foamcore board I had.


After several tries, I found a good arrangement.  Most of them overlapped each other and repeated the same spot, but I found a way.


It's a little distorted and kinda out of whack, but I really really like it!  Just adds to the other zillion pictures of the Eiffel Tower that we have.